InfoPlus Smart Filters
InfoPlus Knowledge Base Article: How to Create and Manage Smart Filters
Required Steps to create Returns Email Report!
- Create a Returns Email Report to create a Smart Filter on the ASN Table.
- Once we have the Smart Filter, we can create an email subscription to send the report by email.
1. Open / Login to InfoPlus
Use the link below to log in into InfoPlus
InfoPlus Login Page
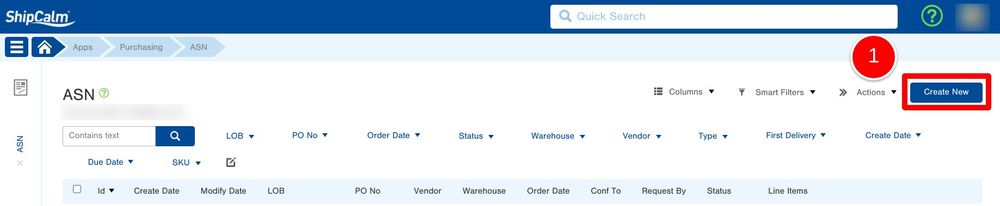
2. Navigate to the ASN Table in InfoPlus
Navigate to the ASN Table in InfoPlus
3. Filter the Table by:
Once on the ASN table, use the filters and the top of the page to find the return specific ASNs.
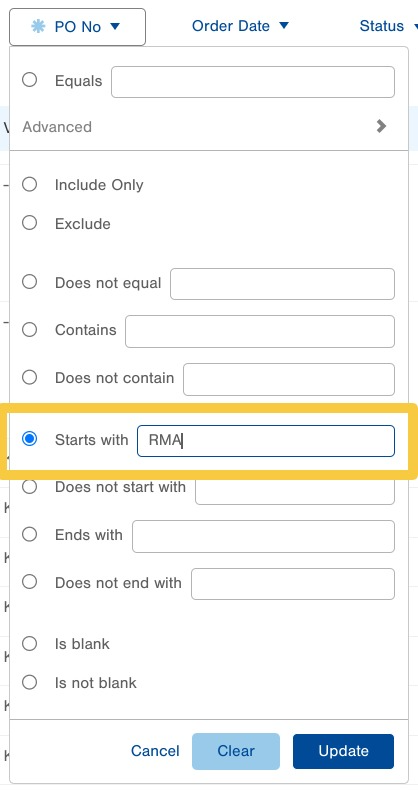
- If you are looking to see only Return RMAs, use the 'PO No' field and the Advanced dropdown to filter by:
- 'Po No' - Starts with - "RMA"
- Select 'Update'
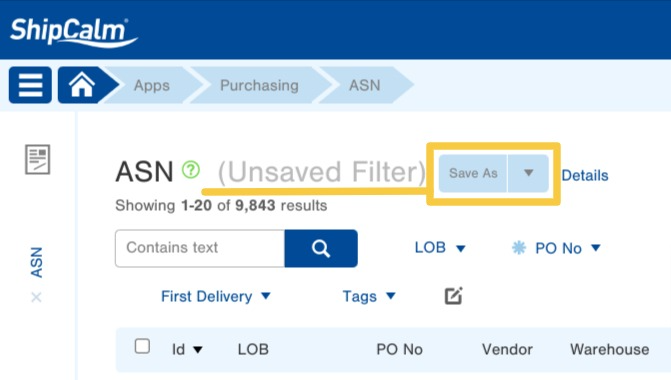
4. Save the Search as a Smart Filter
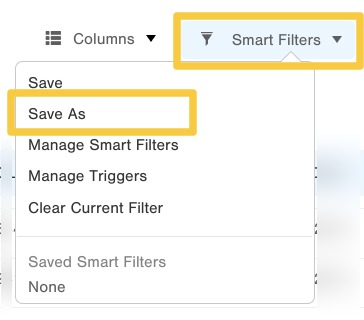
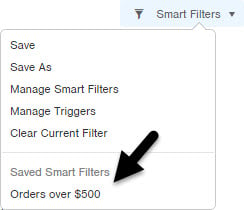
Either click the Save As button next to the name of the Smart Filter in the top left of the Table, or click the Smart Filters drop-down menu and select Save.
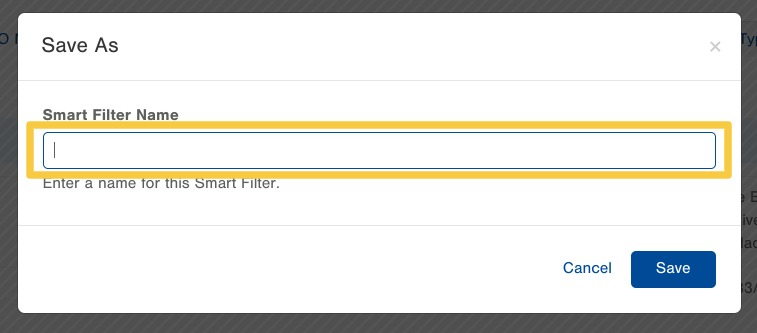
5. Name the Smart Filter
After selecting 'Save As', you will be asked to Name the Smart Filter. Create a unique name and then select 'Save'
- For example, "ShipCalm Return RMAs"
- The Smart Filter will be available in this table’s Smart Filters drop-down menu using the name you save it as.
6. Now, Create an Email Subscription from the Smart Filter
Use the steps below to create the Email Subscription for the Returns Email Report.
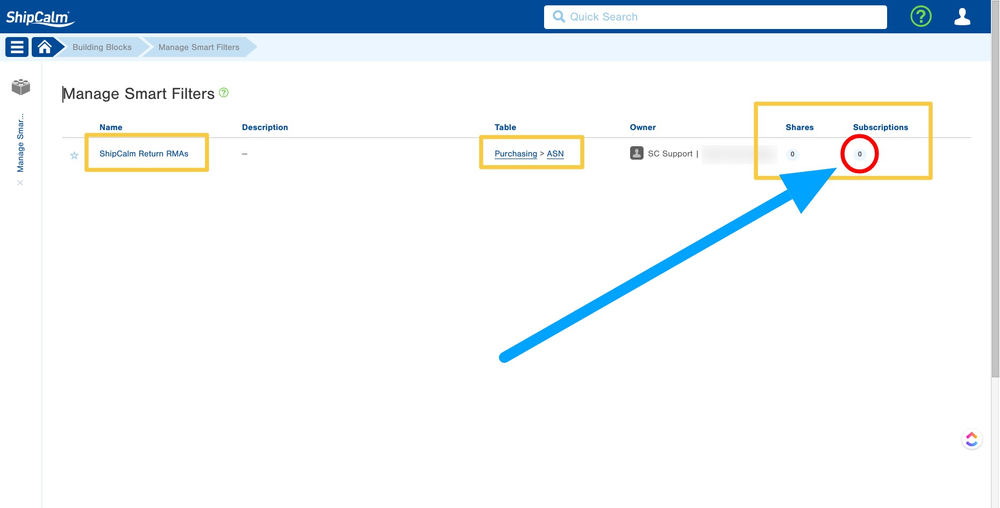
7. Navigate to the Manage Smart Filter Table
Manage Smart Filter Table
On the Manage Smart Filter Table, you will see all of the Smart Filters that have either been created by your user or shared with your user.
To learn more on How-To Share an InfoPlus Smart Filter with other team members use the link above to find out more information!
8. Create a Subscription for the Smart Filter
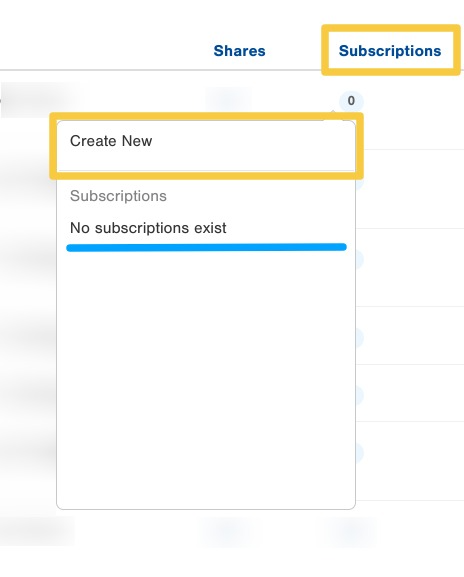
On the line of the Smart Filter that you are looking to create an Email Report Subscription for, select the number bubble under the 'Subscription' column on the table. In the dropdown window, you will see a 'Create New' option. Select the 'Create New' option.
- Select the number bubble under the 'Subscription' column on the table
- Select the 'Create New' option
9. Complete the Subscription Info
Once 'Create New' has been selected, a window will open and you will be prompted to complete the following information:
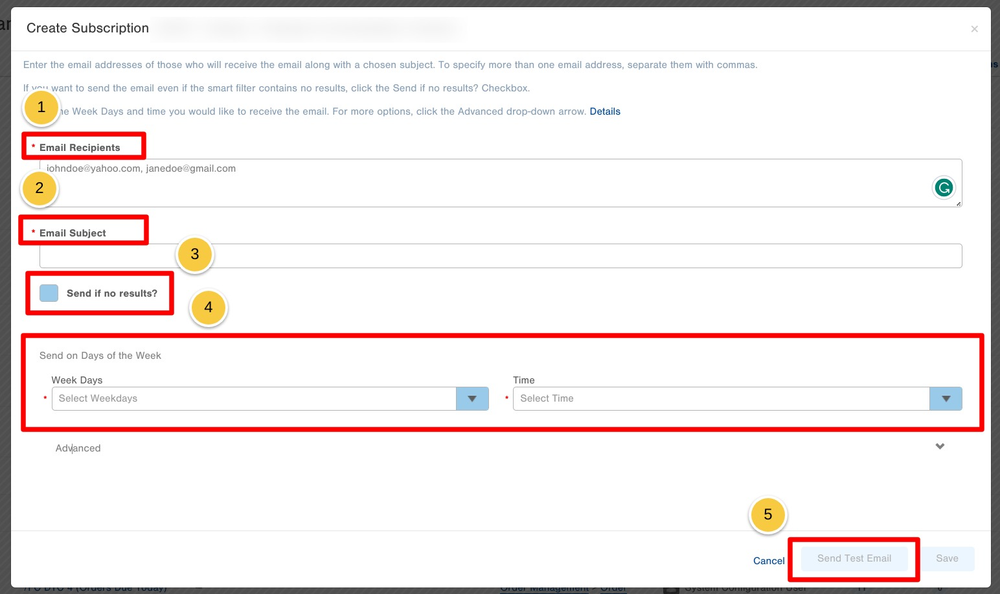
- List of Email Addresses to be included in the subscription report
- Enter the email addresses of those who will receive the email along with a chosen subject.
- To specify more than one email address, separate them with commas.
- Create a Subject Line for the Email Report that will be sent
- Option: Send an Email Report regardless of if there are NEW records in the Smart Filter
- If you want to send the email even if the smart filter contains no results, click the "Send if no results?" Checkbox.
- Schedule when the Email Reports will be created and emailed.
- Select the Week Days and times you would like to receive the email.
- For more options, click the Advanced drop-down arrow.
- Advanced options let you select specific days within a month to receive the email.
- Send Test Email
- If you would like to send a test email, click the Send Test Email button.
- This will give you a sample of what the report will look like in your inbox.
- Save the Subscription
- After completing all of the above fields, select the 'Save' option for the Subscription.
Based on the schedule that was created, you will receive the Email Report as outlined in the schedule.